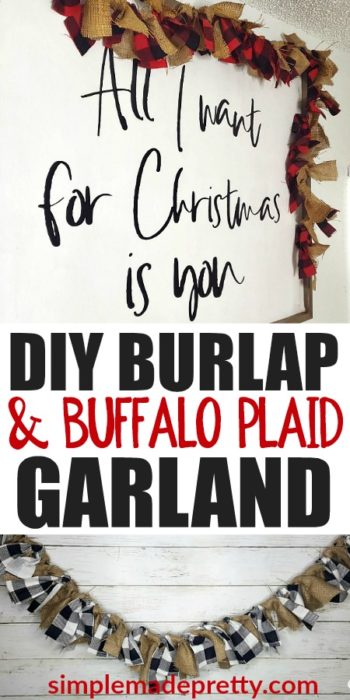
DIY Fabric Garland No Sew
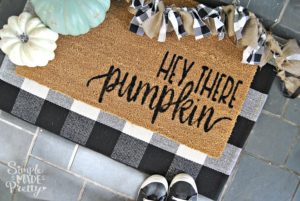
I recently featured this DIY DIY Rag Tie Garland in my Instagram stories in the below image of this DIY Fall Welcome Mat and so many of you requested a blog post tutorial on how to make a burlap rag tie garland so here you go! This burlap fabric craft idea will add to your Christmas burlap fabric decor! Watch the video below for a quick tutorial to make this #5minutecraft 🙂
This shop has been compensated by BurlapFabric.com. All opinions are mine alone. #Burlapdecor #ModernBurlap #BurlapBanner
Want to know where to buy burlap fabric?
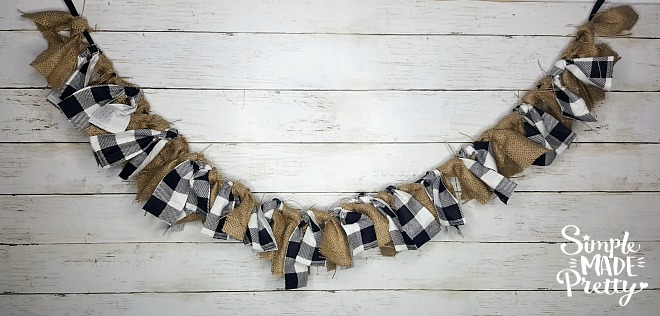
This Rag Tie Garland was so easy to make and didn’t cost much at all! I highly recommend the burlap fabric at burlapfabric.com! Their products are relatively inexpensive but high quality! You can mix and match the burlap fabric with other colors to suit your decor needs, in fact, a teacher reached out to me and said she was using this idea to decorate her classroom with a themed fabric (most teachers choose a theme for their class like fish theme or superhero theme).
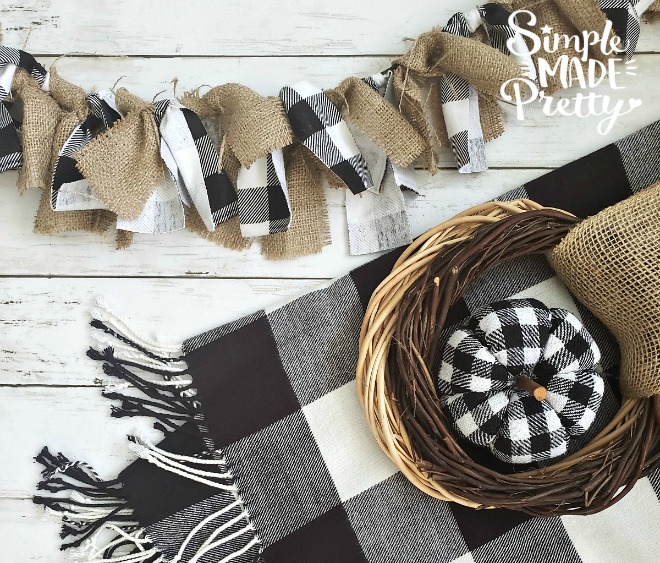
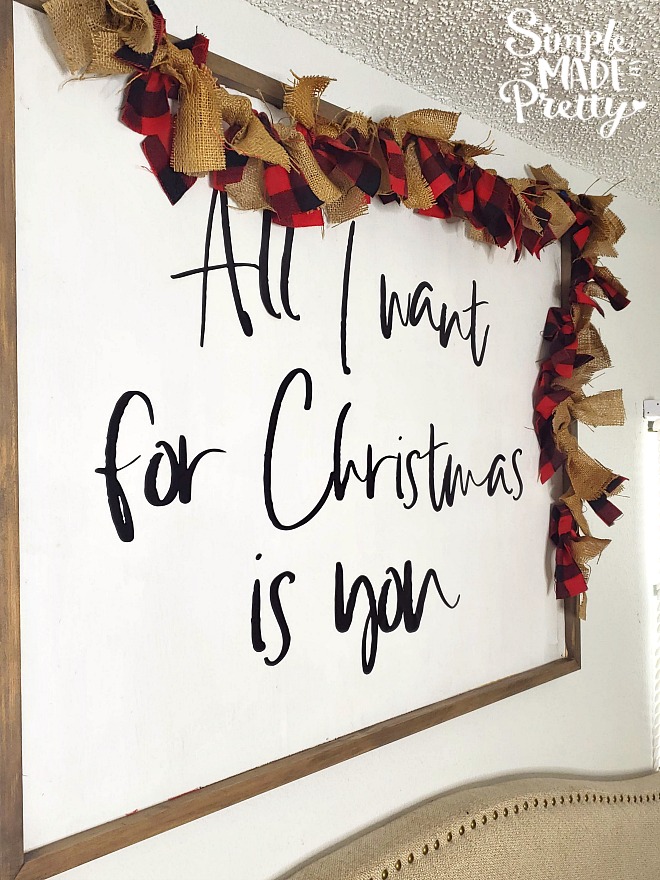
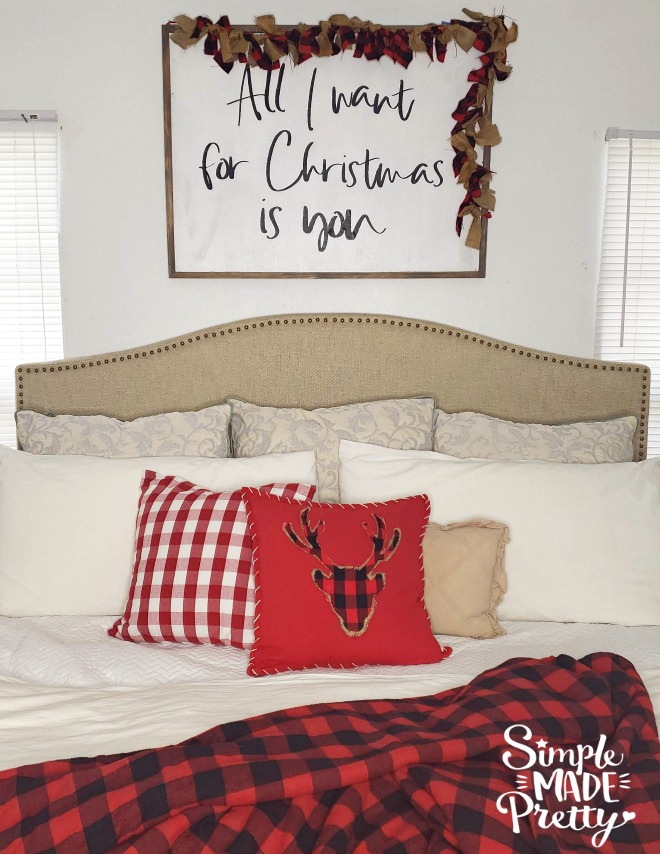
The garland can be hung anywhere you choose. I hung mine over a large chalkboard, however, it would look great on a fireplace mantle, above a bed headboard or foot-board, over a window or mirror… the possibilities are endless!
You can even hang this as a burlap Christmas tree garland!
You can also make the length of the garland however long you choose. I cut my ribbon at 60 inches (because that’s what I had on-hand in the color I liked).
How to make the Burlap Fabric Garland:
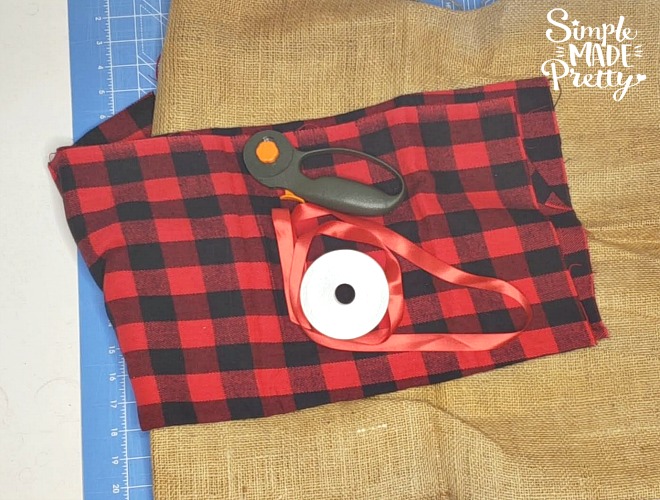
Supplies:
- Burlap Fabric (I used 2 of these squares
- Buffalo Plaid Fabric or your desired print/color (1/4-1/2 yard should do)
- Rotary Cutter or Scissors
- Cutting Mat (optional)
- Ribbon
Directions:
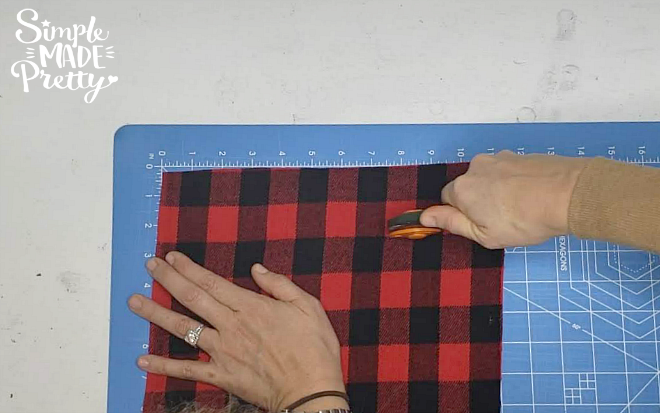
- Gather supplies. I always order my burlap fabric from burlapfabric.com.

- Cut the fabric into 2″ x 12″ strips. I cut 40 strips total (20 of each fabric) to make my garland.

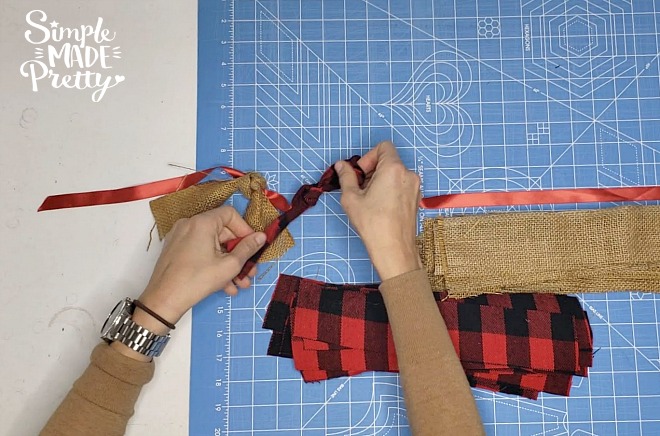
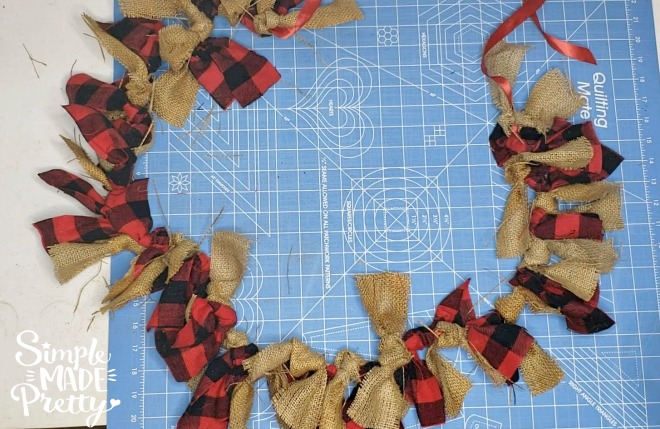
- Tie each strip around the ribbon in an A/B pattern (or create your own pattern) until you reach your desired length. My ribbon was 6 feet long.

- Hang and enjoy!

Pair this Burlap and Buffalo Plaid Garland with one of my free printable buffalo plaid banners (available in red or black and white!).

This DIY Buffalo Check And Burlap Fabric Garland is an easy 5-minute craft project and will instantly update your Fall and Winter Home Decor. Use this tutorial with other fabric colors to decorate any room in your home! I would love to try pink, purple, and teal fabrics to make a garland for a girl’s room. Use Christmas fabrics to make a holiday Christmas garland!
Where to get burlap fabric?
Did you make these decorations or a similar one? I would love to see it! Send me a picture on Facebook, Instagram, or email and I’ll share with my followers 🙂 ***If you have a business account, please tag me to give me credit on social media when posting your creations inspired by me!***
Watch the How-To Video…
Pin it for later…
Psssssttt…Right now I’m offering FREE access to our Digital Resource Library to all of our newsletter subscribers. Your private access includes dozens of free printable crafts, home decor and organization guides. Hurry up and grab your freebies here! (Access instructions are sent after subscribing).
Disclaimer: This post may contain affiliate links or a sponsored post. All opinions are always 100% mine and I don’t partner with any product or company that I don’t use and love. Please see our Full Disclosure for more information.

 DIY Dollar Store Farmhouse Signs (Budget Wall Decor)
[…] it out Buffalo Plaid $23.75 | Tutorial Buffalo Plaid Garland (adsbygoogle = window.adsbygoogle || […]