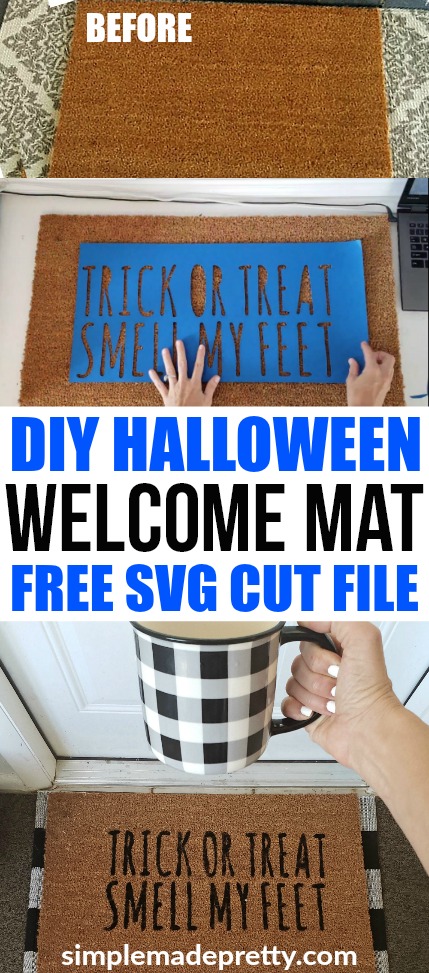
DIY Cricut Halloween Doormat
Those funny and unique welcome mats that you may have seen in your Instgram feed are actually really easy to DIY. I’ll show you how to make a fun doormat to surprise your guests in this post. This Halloween Doormat DIY With Free SVG File is also an easy way to update your front door decor for Fall. Watch the quick how-to make a DIY Halloween welcome doormat video below for a detailed tutorial!
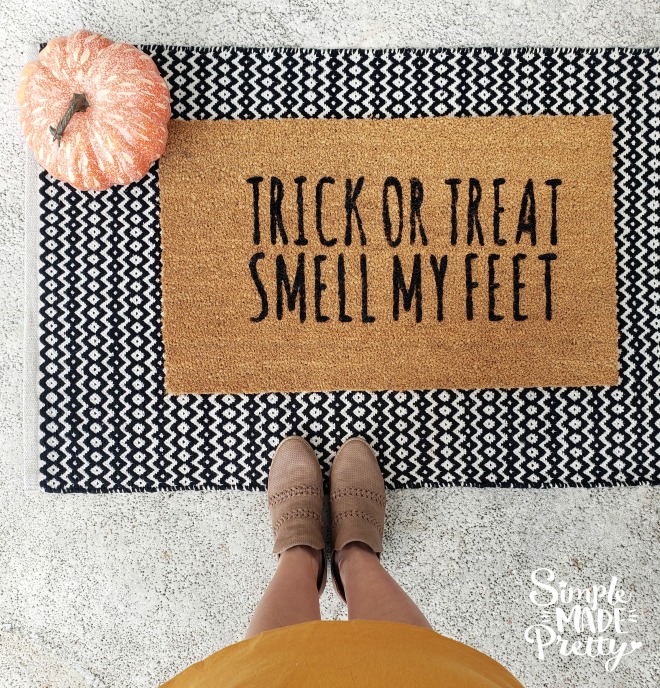
Did you ever sing the song “Trick or treat, smell my feet, give me something good to eat…” when you were a kid? Well if so , I don’t need to finish the rest of the song… you know how it goes!
I thought it would be funny to make a doormat that says “smell my feet” since the purpose of a doormat is to wipe your feet on, right?
Keep reading for how to make this fun craft project and add some humor to your Halloween decor!
You’ll need a Cricut Explore or Silhouette cutting machine to make this project. Just upload the SVG or PNG in the program you use (I use Cricut Design Space), size, cut, and apply!
If you don’t have a cutting machine, you can use an alphabet stencil found at your local craft store to create a similar design.
This doormat was so easy to make, I ordered 5 additional plain doormats to make for other holidays. Our new house in Florida has 6 exterior doors… that’s a lot of doors for a 1600 square foot house, right? So I figured that I need a doormat for all 6 doors, hehe.
How to make the Halloween Welcome Door Mat With Free SVG File:
Supplies:
- Cricut Explore/Silhouette cutting machine
- 12 x 24 Cricut Cutting Mat
- SVG file (get it free below or design your own)
- 12 x 24 Cardstock (I used this, use in any color – this will be your stencil)
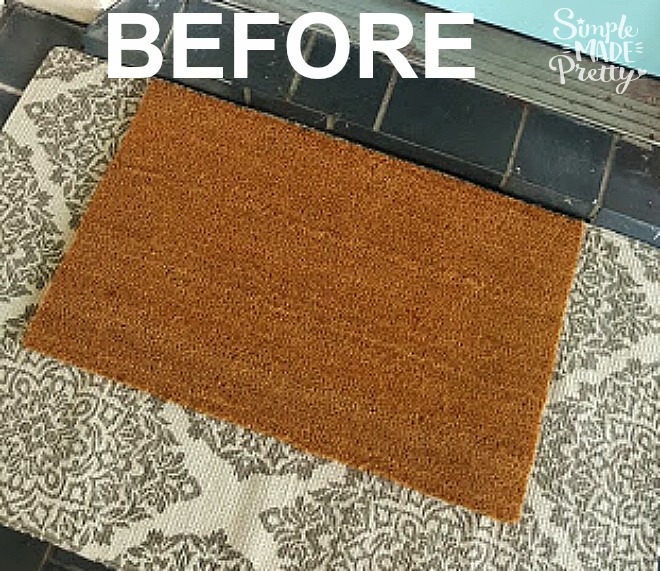
- Plain Doormat (these are a reader favorite!)
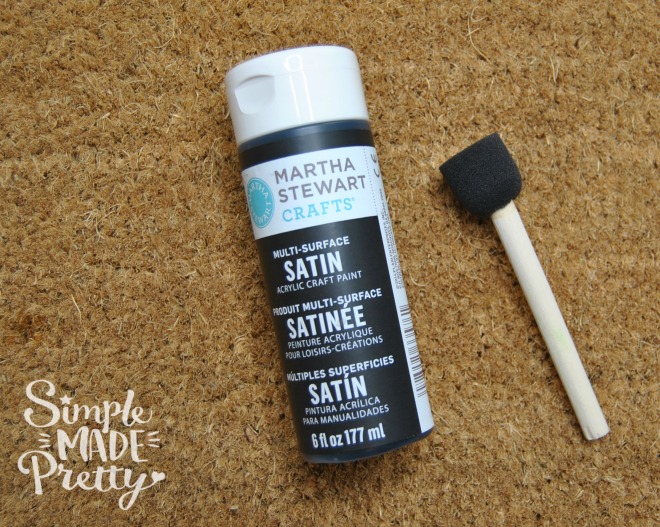
- Fabric Paint (this paint is the best for this project)
- Stencil brush
- Painters Tape
- Gloves (optional)
Directions:
- Gather supplies and watch the video below for more info. You will need a plain doormat (I used this one which shipped to me in 2 days for free!), fabric paint (this type of paint is waterproof to guard against rain, etc), stencil brushes (you can find a pack of these at your local craft store – I wash mine out after every use to extend the life), painters tape (you can find it at your local craft or hardware store), and a stencil ( I show you how to make a stencil using the free SVG file and a Cricut machine below).

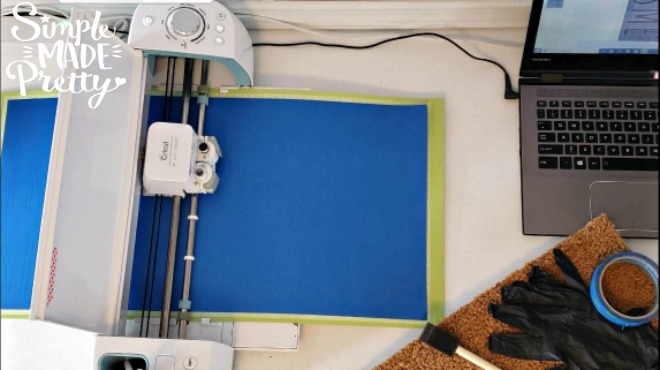
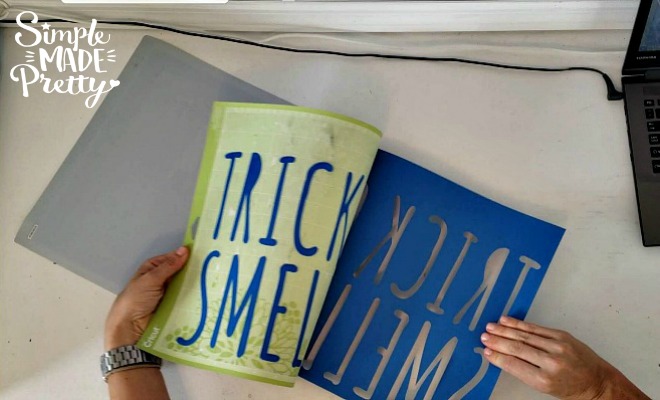
- Download the SVG file and upload to Cricut Design Space. Do you need help uploading a file to Cricut, let me know in the comments or send me a message, I’d love to help!
- Size the image depending on the size of your doormat. If you purchase the doormat I mention above, my image was sized 21.1″ x 9.8″.

- Cut and weed the image (remove the negative part of the cut image, in this case, you will remove the letters inside). I used heavy cardstock to create my stencil. You can use stencil material if you plan to use it again. I throw away the cardstock but you might be able to get another use out of it, depending on the wetness from the paint.

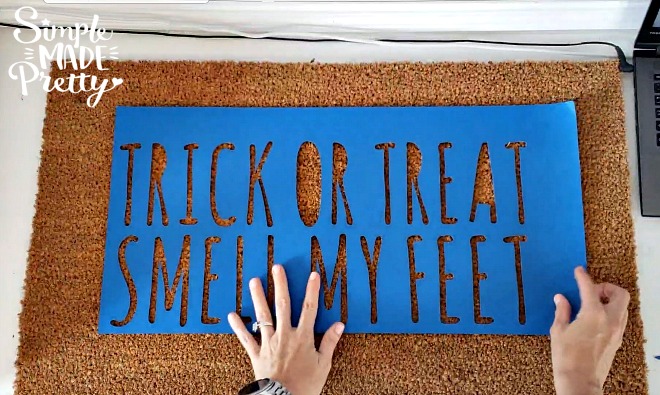
- Arrange the image on the doormat using painters tape to secure. I had to carefully place the center for the “‘o” the “r’s” and the “a” and put a small piece of painters tape behind each to secure to the mat. You will need to be very careful when applying paint around those areas.

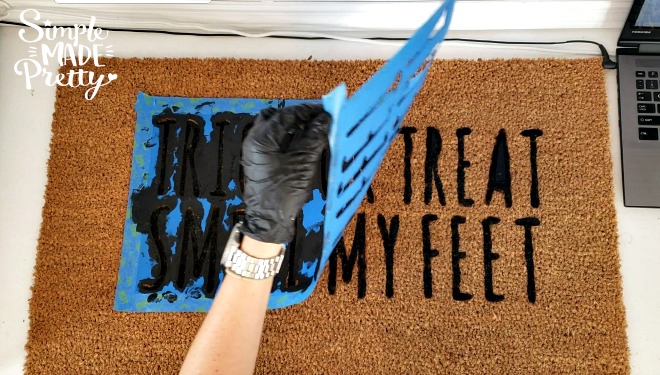
- Use paint and stencil brush to paint inside the image. Wear gloves because you will need to use your fingers to hold down some sides! I use these gloves for every project around the house (so I don’t mess up my nails) and the hubby uses them for big house project too.
- Peel off the vinyl stencil right away to reveal the finished project. You don’t want to leave the stencil on there for very long otherwise the cardstock might stick to the mat. You can fill in any spots with a black sharpie or more paint with a small brush.

- Let dry for 24-48 hours before placing outside (in case it rains – fabric paint needs time to dry completely before becoming waterproof).
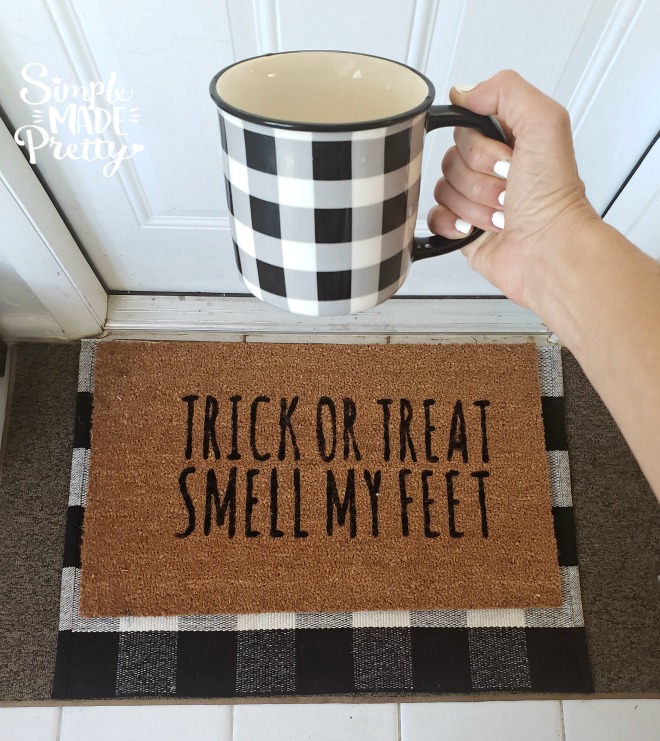
This Halloween Doormat DIY With Free SVG File will surprise your guests and trick or treater’s while personalizing your home decor. I can’t wait to try more designs for upcoming holidays and share them on Instagram! I’ve already come up with DIY Welcome doormat ideas for Christmas so be sure to subscribe to get my emails and updates with more SVG files!
Learning how to use your Cricut is really easy and fun once you get the hang of it. I love using Cricut Design Space print then cut feature. If you don’t have a Cricut Access Membership, I highly recommend it. I’ve had a Cricut Access Membership for years and it’s definitely worth the cost for all the benefits!
Did you make this doormat or a similar one? I would love to see yours! Send me a picture on Facebook, Instagram, or email and I’ll share with my followers 🙂
Watch the How-To Video…
Grab the Free SVG File!

Pin it for later…
You might also like…


Psssssttt…Right now I’m offering FREE access to our Digital Resource Library to all of our newsletter subscribers. Your private access includes dozens of free printable crafts, home decor and organization guides. Hurry up and grab your freebies here! (Access instructions are sent after subscribing).
Disclaimer: This post may contain affiliate links or a sponsored post. All opinions are always 100% mine and I don’t partner with any product or company that I don’t use and love. Please see our Full Disclosure for more information.
 Free Printable Buffalo Plaid Banners
[…] decor. I can’t wait to try more designs and share them on Instagram! I already come up with this DIY Welcome doormat ideas for Halloween and this DIY Welcome Mat for Fall so be sure to subscribe to get my emails and updates with more […]