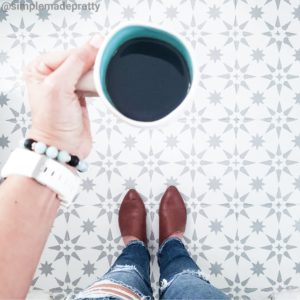
How To Stencil Tile Floors
If you love the idea of adding a design or updating your tile or linoleum floors but the idea of re-tiling or replacing linoleum doesn't appeal to you, then stenciling your floor is probably your best solution. In this tutorial, I share how to stencil tile floors, how do you keep paint from bleeding under stencils, and how to stencil the popular Spanish tile pattern on floors. Keep reading to learn How To Stencil Tile Floors and watch the time-lapse video showing you how I stenciled our Master Bathroom floor.
Print
Pin
Yield: 1 floor
Cost: $30
Supplies
- Stencil (I used this Spanish Tile stencil for our master bathroom floor)
- Painter's Tape
- Stencil brushes
- Paint Brush (for touching up, getting corners)
- Paint Roller & Tray
- Paint (I used Linen Chalked Paint for the background & Gray Chalked Paint for the stencil design)
- Polyurethane Water-Based Crystal Clear Gloss
Rags
Instructions
- Gather Supplies. Please watch the video below with more instructions and pictures! My stencil came with a grout line, however I choose not to use the grout line on our floor. The grout line does make the tile look even more amazing if you choose to use it on your floors :)
- Thoroughly clean the floors (vacuum, mop, etc) and remove all items from the floor.
- Use painters tape to protect any surrounding walls, doors, fixtures, etc.
- Use the paint roller and base paint color to cover the entire floor with paint. Apply a 2nd and 3rd coat if necessary with at least 20 minutes of dry time between coats (I used a fan to help speed the dry time).
- Use painter's tape to secure all 2-4 sides of the stencil to the tile. Cutting Edge Stencils has a handy video showing how to DIY a stenciled floor too!
- Use a stencil brush to apply your choice of chalked paint color in the stencil.
- Once all the spaces are painted inside your stencil, remove the stencil and align on another tile on the floor. I did not paint the tiles directly around this first tile so I could let the paint dry since some of the stencil overlaps and you don't want it touching the wet paint.
- Repeat this process until the floor is complete.
- The corners and around the toilet were the tricky parts. This is where ordering the 2nd stencil comes in handy because you can cut the stencil to fit the corners. I didn't have a 2nd stencil so I bent my stencil and manipulated it to fit. I did have to go back and touch up some areas though.
- I also had to touch up other areas with bleeding or spots. These mistakes were mostly because I rushed to complete my floor and I wanted it to look perfect. If you take your time and let each section dry, you will not have as many mistakes as me, lol.
- Let the stencil paint dry for an hour or 2 before applying the poly.
- Use a foam roller to apply at least 3 coats of polyurethane water-based clear coat to your floor. Let each coat dry for 30-60 minutes.
- We let the entire floor dry without walking on it for a full 24 hours. After that, you can easily wipe up the floor to clean!
Did you make this project?Mention @simplemadepretty or tag #simplemadepretty!